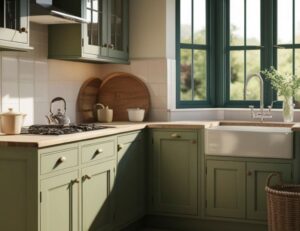
When painting your Dundee kitchen cabinets, achieving a smooth finish is essential, and a smooth finish is best achieved through thorough prep work. When preparing the cabinets for the primer and the paint, you will go through some processes that will impact the finish. From caulking any imperfections, to cleaning up all the sanding dust before you apply the primer, you’ll want to make sure that each step of the process is done perfectly. Here are some things to keep in mind:
Sanding the Doors
The preparation process should always start with the sanding, because it removes the protective upper layer of lacquer and creates a surface where the paint can stick properly. Depending on your cabinet material, the sanding process can also help to smooth out imperfections. You can perform this process by hand, or you can use an electric sander, which will make the job easier and provide a smoother surface. Sanding can also be used to prepare the surface after you’ve applied the first layer of primer, in order to ensure that the paint sticks more easily. Ideally, you’ll want to use a paper that is between 120 to 150-grit, but you can go as low as 100-grit, especially if you have oak cabinets.
When sanding the first or second layer of primer, you should use 220 grit. However, if you’ve had some accidents during the priming process (such as a fingerprint or brush marks), you can use a 150-grit sanding paper to clean it up. You can also address any minor imperfection within the first layer of paint with a sanding sponge, or a 220-grit sandpaper. Be careful though, because it’s very easy to sand the paint down all the way to the primer.
Controlling Dust
Dust is your number one enemy during a cabinet painting project. The sanding process will create a large amount of dust that will linger in the air for hours after you are done. Needless to say, this can be an issue when applying the different coats of primer and paint. To avoid this issue, you can sand the cabinet doors outside, or in a different room. If this is not an option for you, you can take a vacuum hose and place it right next to the sander as you go through the motions. As an additional measure, you can use a fan near an open window, facing the outside. This will draw most of the dust that escapes the vacuum and remove it from the room. For dust that remains on the surface of the door, you can use a tack cloth or a damp rag. Just make sure that you clean up the dust after each sanding.
Spraying
Different painters will have different preferences when it comes to their tools, but one of the best options is a paint sprayer. Rollers and brushes tend to leave marks on the surface, and they usually take more effort and time to complete a project. With a paint sprayer however, you can achieve that perfectly smooth finish much faster and at a much higher quality.
While the idea of using a paint sprayer may seem intimidating at first, there’s really not much to it. You can purchase a mid-range sprayer (you don’t need the top-shelf equipment for a one-time project), or you can rent a professional sprayer for as little as $50-$75/day, and you’re good to go. It should feel natural right away, and you should cover the area surrounding the cabinets before you start painting.
Making the Most Out of Your Dundee Kitchen Cabinet Painting Project
Getting that perfectly smooth finish for your cabinets feels great, and with the right instructions, you can do it. However, if you need any help with kitchen cabinet painting in Dundee, contact us today! For decades, residents of Dundee have turned to us for all the kitchen cabinet painting needs.