Painting your kitchen cabinets can be a pretty long process. If you don’t prep your cabinets well enough, there’s a good chance that your paint finish won’t last very long. Proper preparation also provides a strong foundation for achieving the stunning professional look you want for your cabinets.
So, how do you prepare your kitchen cabinets for a beautiful, long-lasting finish?
Remove the Hardware
Unless you’re planning to replace your cabinet doors or drawer fronts (which you probably aren’t), you’ll need to remove them before you begin your kitchen cabinets painting project. This will ensure a much neater and a more professional-looking paint job.
After you remove your hardware, make sure you put your hinges, knobs, handles, and screws in a safe place, so when the painting project is finalized, you can easily install them back.
Cover the Surrounding Areas
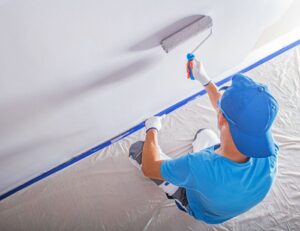
The last thing you want to do is spend time cleaning up paint splatters on your flooring, walls, and countertops after you’re done painting the cabinets. So, make sure every surface near your cabinets that you don’t want to be painted is covered with some sort of paper, cardboard, or plastic sheet. You can also use blue painter’s tape because it’s easy to remove and doesn’t leave behind any marks.
Degrease Your Cabinets
Most paints claim to block stains, but the oil stains are something different — any oil left behind will affect the look of the paint. Plus, the oil stains will show through the paint.
You don’t want to put in multiple days of painting just to find out that you’re going to have to repaint the cabinets to remove those unsightly oil stains. You can use any degreaser to get rid of oil stains. Just be sure to clean all the degreaser from the cabinets once you’re done.
Sand Your Cabinets
Sanding your cabinets is probably the hardest part of the prepping process. To do this correctly, first, make sure the cabinets are dry to the touch. Then, sand your cabinets with a (preferably) 220 grit sanding block — anything coarser than 220 may cause deep scratches that will show through your paint finish.
Remove the Dust
Once you’re done sanding cabinets, you’ll want to remove all the dust that’s left afterward. Failure to remove all the dust from sanding can cause two problems:
- Paint failure. Dust will prevent your primer from sticking to the cabinets properly. Dust creates a layer between your cabinets and primer, which means your primer won’t come directly in contact with your cabinets.
- Gritty finish. Once the primer dries on dust, the primer will take on the characteristics of the dust, which is a gritty texture. Plus, the gritty texture will make it hard to clean your cabinets later. It’s easier to clean smooth cabinets than gritty texture cabinets. To remove the dust, you can simply vacuum the dust away or use microfiber cloths.
Caulking and Wood Filling
Caulking and filling any imperfections in your cabinets will go a long way in making the paint job look professional.
If you need to wood fill any portion of your cabinets, make sure that’s done before you caulk. This is because, after you fill your holes or grain with wood filler, you will need to sand the wood filler smooth.
With your caulking, make sure to smooth it out properly, removing any excess caulk and residue from the surface.
Prime Your Cabinets
The last step of the prep work is to prime your cabinets. Before you prime, however, you’ll want to make sure your caulking is completely dry. If you don’t let your caulk dry, then the caulk may shrink or crack after you’re done painting your cabinets.
Professional Kitchen Cabinet Painting Service in Roselle, Illinois
You can avoid the hassle of DIY painting your kitchen cabinets in Roselle by partnering with us! A high-quality and affordable painting project with Prime Time Painting will reinvigorate your home and raise its value.
If you would like to learn more about our kitchen cabinet painting services in Roselle or request a free consultation, contact us today!

